Create New Media

In Media Manger, you can create new media from the Deliveries tab or the Media tab. Media can be added to deliveries or managed independently of deliveries.To create new media:

  1. Determine whether you would like to create the new media either on the Deliveries tab or the Media tab. Expand the options below to learn more about the differences between the two.

    ClosedDeliveries tab

    When creating new media via the deliveries tab, the new media will be added to a delivery.

    • On the Deliveries tab, create a new delivery or double-click an existing delivery.

    • On the Delivery summary page, click Add New Media.

    ClosedMedia tab

    When creating new media via the Media tab, the new media will not be added to a delivery. You can always choose to add it to a delivery later.

    • On the Media tab, click Create.

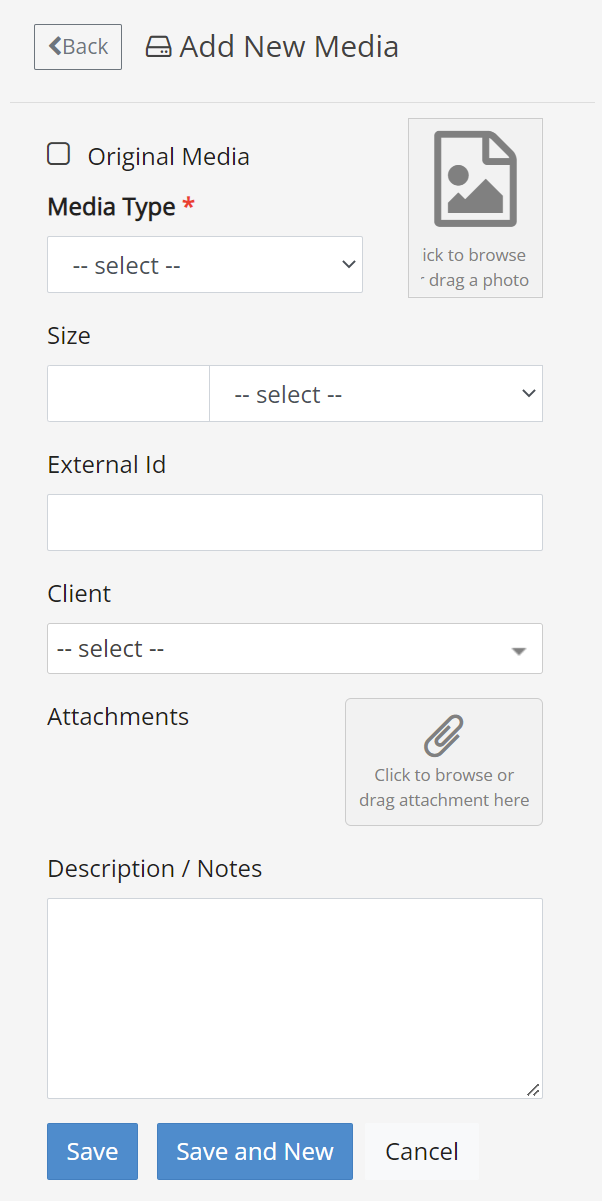
  2. Complete the Add New Media form by filling out the fields as described in the following table. Ensure you have all necessary details and files before proceeding.

  3. ClosedClick to view field descriptions

    Note: Only Media Type is required (as indicated by *); all other details are optional. Greater detail provides more traceability, however if you are unsure about any of the entries (and they are not required by your firm), leave them blank.


    Field

    Applies To

    Description

    Original Media

    All

    Select this option if you are receiving media in the format it was originally created.

    Media Type

    All

    Select the type of media being defined:

    • Blu-Ray: Digital optical disc

    • CD: Compact disc

    • Drive: Hard disk, solid-state, or Universal Serial Bus drive (HHD, SSD, or USB)

    • DVD: Digital versatile/video disc

    • HD DVD: High-density optical disc

    • Network Share: A location on your firm’s network

    • Other: Any other type of media, for example, a web-based storage location.

    CD or DVD Type

    CD or DVD

    Select from common disc formats: Single Layer, or Dual Layer.

    HD DVD Type

    HD DVD

    Select from disc formats: Single Layer, Dual Layer, or Triple Layer.

    Client

    All

    Select the OPEN DISCOVERY client to which the media belongs.

    Clients are defined in Case Management, and managed in OPEN DISCOVERY Services.

    Note: You can define media without selecting the client, but you will not be able to process data until a client is selected.

    Container Type

    Network

    Enter the entity that holds the data, such as a .ZIP file, .PST file, or a folder.

    Description / Notes

    All

    Enter any pertinent details about the media.

    Drive Type

    Drive

    Select the type of drive:

    • HDD (Hard Disk Drive)

    • SSD (Solid State Drive)

    • USB (Universal Serial Bus)

    Drive Connection

    Drive

    Select the type of interface (port) by which the drive is connected:

    • eSATA
    • IDE
    • SATA
    • USB 2
    • USB 3

    Drive Form Factor

    Drive

    Select the drive’s form factor:

    • External

    • Internal 3.5

    • Internal 2.5

    Drive Model

    Drive

    Enter the drive's model information.

    Size

    All

    Enter the media’s size (in KB, MB, GB, or TB).

    Serial Number

    Drive

    Enter the drive’s serial number.

    Manufacturer

    CD, DVD, Drive

    Enter the disk or drive’s manufacturer.

    Label

    CD, DVD, Drive

    Enter the disk or drive’s label details.

    External ID

    All

    If your firm has another delivery tracking system, enter that system’s identification here.

    Storage Location

    CD, DVD, Drive

    Select the physical storage area for the media when it is not being copied.

    Network Path

    Network

    Enter the full UNC path for the content comprising the media, for example:
    \\server001\mediacontent\smith\10-15-2016\

    Image or file attachments

    All

    See below for details on attaching image or other files to the media definition.

    Description / Notes

    All

    Enter other details about the media.

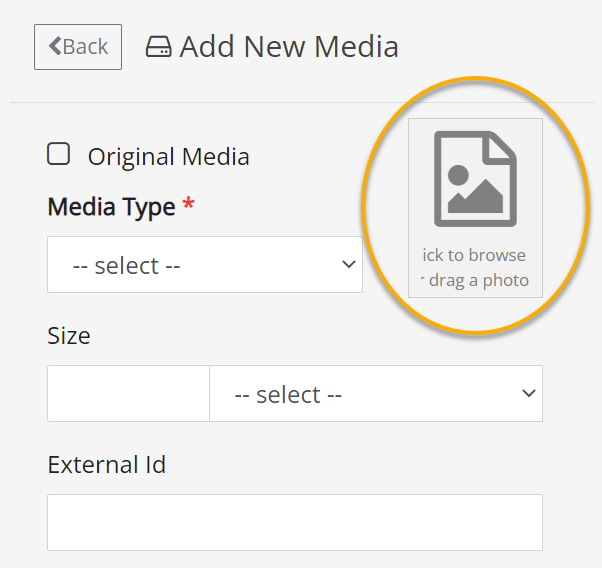
  4. Optional. In addition to defining basic media details, images and other files can be attached to a media definition to help you better identify and/or track the media. For example, if a container arrives with several different media included, you might take a picture of the original container so that it can be associated with that media. You can either drag and drop or select an image file or multiple image files to include with the media:

  5. ClosedDrag and drop image files

    • Open Windows File Explorer and navigate to/open the folder containing the file(s) to be included.

    • Position File Explorer and OPEN DISCOVERY so that both are visible.

    • In File Explorer, select one or more files, then drag them to the add image area (at the top of the form):

    • The first image uploaded will be defined as the default image; it will appear in the form.

    • Hover your mouse over the image to use the image taskbar to view and manage the attached images and change the default image:

    • Note: Before a media definition has been saved, the Delete button removes all images.

    ClosedSelect image files

    • Click the add image area.

    • In the Choose File dialog box, navigate to and select the image file(s) to be added to the media.

    • Click Open.

    • Use the image taskbar as described in the section above to view and manage images.

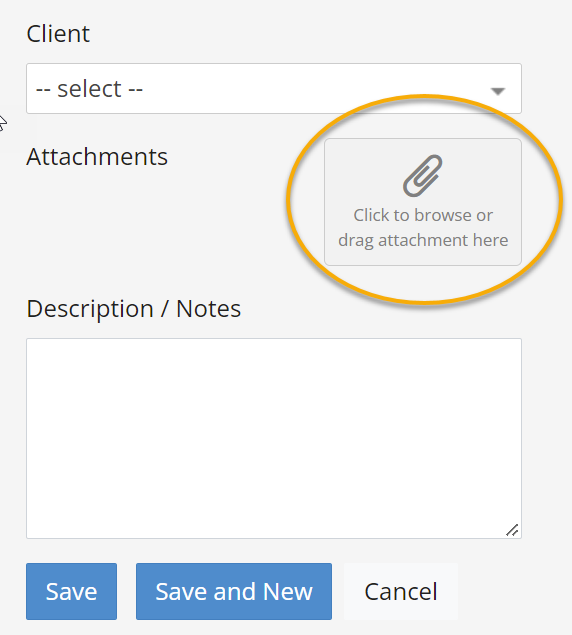
  6. Optional. In addition to images, you also have the option to attach one or more files to the media. For example, if you receive media with a shipping manifest, you may want to include a copy of the shipping manifest in your definition of that media. Files attached to media are copied to a location defined in the System Manager. Make sure this location is defined before you attach files. Check with your administrator and/or check Define Media Attachment File Path for details. Take the following actions to attach files to your media:

    • Near the bottom of the form is the add attachment area as shown in the following figure.

    • Use the drag-and-drop or file-selection method described in step 2 to attach the needed file(s).

    Note: Attachments are not uploaded until the media definition is saved (and cannot be opened from the form until saved). When added, files are listed in the Attachments area, however, and can be deleted before saving – if a file needs to be deleted, click the corresponding button.

  1. When finished, take one of the following actions:

    • Click Save to complete the definition.

    • Click Save and New to complete the definition and define additional media.

  2. Optional: After the media is saved, print the Media ID barcode:

    1. Click Print Barcode. The barcode appears in a browser window, and then the Print dialog box displays.

    2. Complete the Print dialog box and click OK.

      Note: Ensure that you select the correct printer and the paper tray containing your barcode labels or paper. Specific print options depend on your printer.
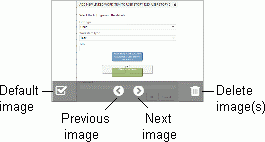
  1. For each media defined:

    1. Review the Media details form.

    2. Note the unique media identification (ID). This is a sequential number with barcode, optionally in a format defined by your administrator.

    3. Work with defined media as explained in Manage Existing Media.

    4. Continue with Processing Media Data.

    5. Click < Back to return to the Deliveries or Media list, or click another tab to perform other work.

Related Topics

Process Data Locations

Copy Data to Network