Configuring File Archiving
You can archive numerous file types in various online and offline repositories, including Microsoft OneDrive and SharePoint, and proprietary file systems. Strict Retention Compliance can be enforced by applying retention policies to specific versions of the files archived from the various locations. You can choose which versions of the archived files to search and export.
It is not necessary to create a policy in NetGovern to guide this job.
There are two types of File Archiving job:
-
The Direct From Source option allows you to perform archiving and indexing simultaneously. The Direct From Source job both archives and indexes data in the source location.
Select this option if you wish to crawl and archive large quantities of data. When the Direct From Source job has run, you can search the archived data.
-
The Index Search Query option allows you to perform archiving only. To search the data archived by the Index Search Query job, you will first need to set up a separate File Indexing job—see Configuring File Indexing.
Select this option if you wish to archive file content using granular NQL-based policies.

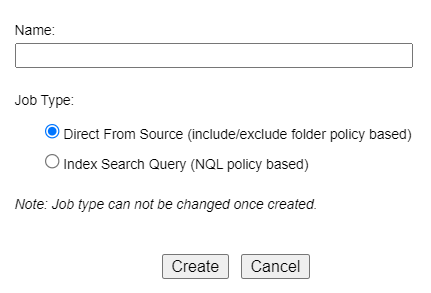
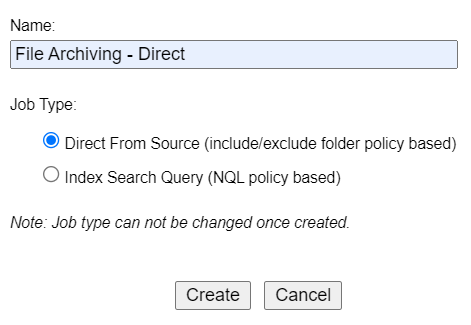
Once you have created the job, the selected job type cannot be changed.
To search archived files, you must have set up a Live Location for indexing purposes—see Configuring Locations. However, this is not required if you want to archive file content purely for compliance reasons (not to search it).
- Log into the NetGovern Admin UI.
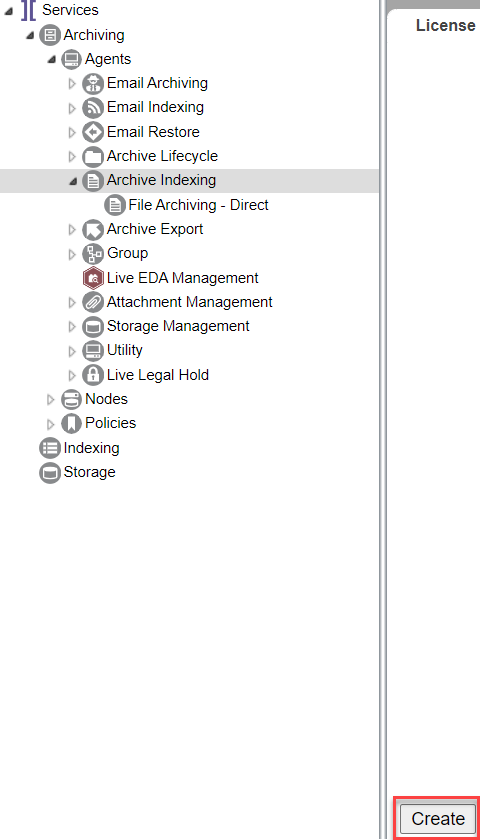
- Go to Archiving > Agents > Archiving Indexing.
- At the bottom-left of the License tab, click Create.

- Enter a meaningful name for the job.
- Choose the Job Type you wish to create. In this case, select Direct From Source.
- The newly created job appears in the navigation tree under Archiving Indexing. Click on it.
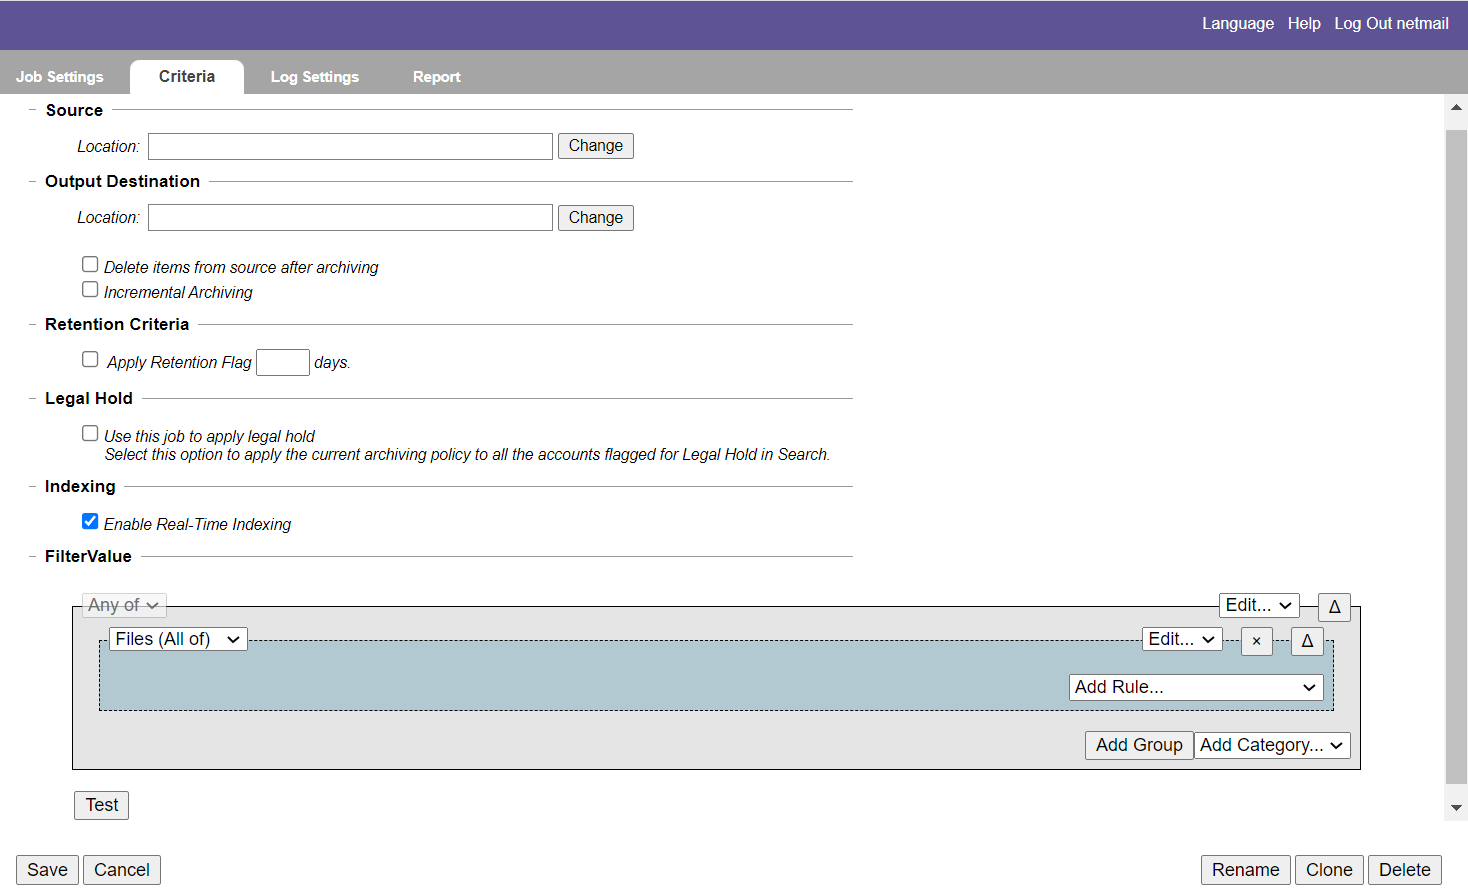
- Navigate to the Criteria tab to begin configuration tasks. Note that certain default settings are preselected.
- In Data Source, select the correct source location from the drop-down menu.
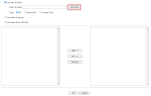
- In Output Destination, you can click Change to adjust the output location. Use Find to identify an applicable Archiving Location you previously created.
Click OK. 
- Select Incremental Archiving to only archive data that was not archived since the last time an archive job was run on the data in question. If a new version of a previously archived file becomes available, the new version is archived as a separate copy but can be traced to the original file.
- Leaving Incremental Archiving unselected will ensure that all content is archived from the very beginning, unless you make a date selection in the following step.
- In Retention Criteria, select the Apply Retention Flag option to apply a flag to messages archived in NetGovern, indicating the period that the archives should be retained within NetGovern.
Set the number of days corresponding to the retention policy you established. These flags will be used in conjunction with deletion (Information Lifecycle Management) jobs. Enter the number of days the retention flag will apply.
The retention period is indicated by the number days. For example, five years is expressed as 1,825 days.
Then choose between Created Date, Archiving Date, or Last Modified Date, which may or may not correspond to each other. 
- In Legal Hold, you can select Use this job to apply Legal Hold. Enabling this option triggers the job to look for users previously placed under Legal Hold in NetGovern Search—see Applying Legal Hold.
If such users are found, any files associated with these users in the location specified above are placed on Legal Hold. - In Indexing, Enable Real-Time Indexing is enabled by default. This function makes it possible to search the archives. Deselect this option if you do not need to search the archives, for example, if you are archiving a particular location for compliance purposes only.
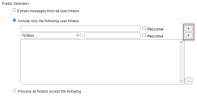
- In Options, specify the Folder Selection to set the (sub)folders to be indexed. You can do this through the process of inclusion or exclusion. Select one of the following:
- Extract files from all folders: Does not restrict the scope of the job.
- Include only the following folders: Restricts the scope of the job by including only the specified (sub)folders. Enable Recursive to apply the inclusion policy to the subfolders of a specified folder.
- Process all folders except the following: Restricts the scope of the job by excluding the specified (sub)folders. Enable Recursive to apply the exclusion policy to the subfolders of a specified folder.
- Click Save.
- In the Job Settings tab, enter a Description. You can enter the name of the archive job.
- In the Job Priority section, set a priority, choosing from Low, Normal, and High. Normal is the default priority.
-
NOTE
This setting is useful in scenarios where multiple jobs are running concurrently and you want to control which job takes priority with respect to thread allocation. The job priority you select determines which job in the queue is selected next by the JobManager process, which is responsible for allocating queued job threads to available thread slots on the archive nodes. Prioritization is categorized according to user account. For example, you may want to assign higher priority to crawling files created by VIP users. If a normal priority job is already running and using all available job threads, setting the priority to high and executing it will direct any freed threads to be used on the new high-priority job. This feature works in conjunction with load balancing in order to control crawling job distribution. - If the job will run regularly, set a Schedule. In the Schedule section, choose from the following:
-
Daily: Set the job to run every day. Specify the desired time (HH:MM).
-
Weekly: Set the job to run every week. Specify the day(s).
-
Specify Date: Set the job to run on a specific date (MM/DD/YYYY).
-
Every X minutes: Set the job to run every specified number of minutes.
-
Select Disable if you do not intend to set a schedule for this job.
-

- Select Users. To archive all user accounts, leave All users from location enabled. To specify the accounts for archiving, disable the option All users from location and click Select to find the users to include.
-
Select the Users to include in the job. Click Select to find the user accounts.
-

-
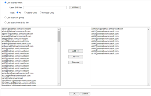
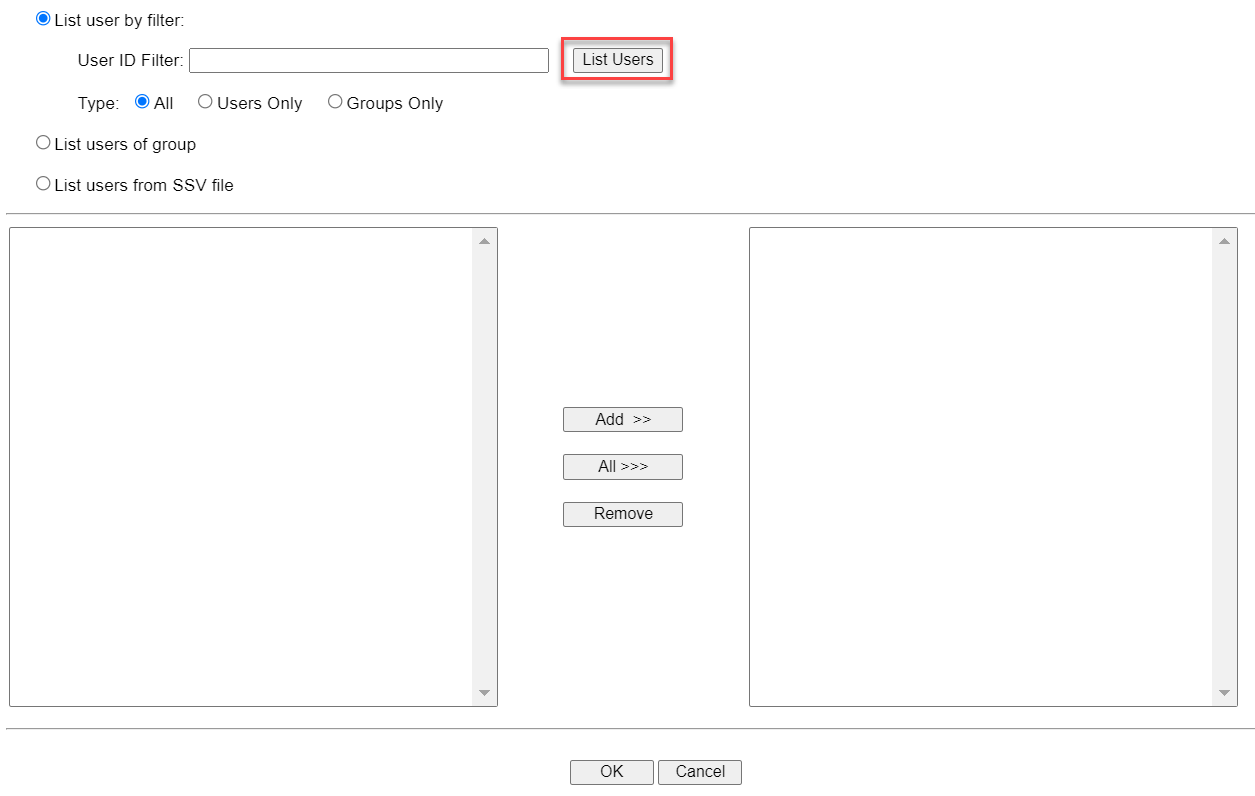
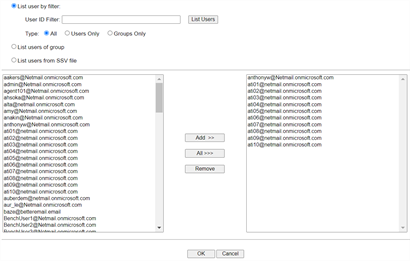
- To list users by ID Filter, enter the User ID Filter. You can also click List Users to list all.
- To lists users by Type, select All, Users Only, or Groups Only.
- To list users by group, select List users of group and select the correct group member list from the drop-down.
- To list users by SSV file, select List users from SSV file and ensure the correct SSV file path is entered.
- Once listed, you can select the users and click Add. When moved to the right-hand display, the users are included.
-
- Click Save.
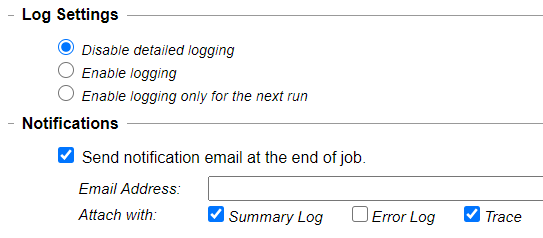
The job will run according to the schedule you set. Otherwise, click Run Now to start a job immediately. - (Optional) Logging provides you with detailed job logs that can assist with job troubleshooting, if needed. In the Log Settings tab, configure desired log settings:
- Disable detailed logging (default setting)
- Enable logging
- Enable logging only for the next run
- You can also have email Notifications sent at the completion of a job, along with attachment options.

For further information on logging, see Configuring Logging.- In the Report tab, check on the progress of the job.
For further information on reports, see Viewing Reports.


- Log into the NetGovern Admin UI.
- Go to Archiving > Agents > Archiving Indexing.
- At the bottom-left of the License tab, click Create.
-
- Enter a meaningful name for the job.
- Choose the Job Type you wish to create. In this case, select Index Search Query.
-
- The newly created job appears in the navigation tree under Archiving Indexing. Click on it.
- Navigate to the Criteria tab to begin configuration tasks. Note that certain default settings are preselected.
- In Source, you can click Change to adjust the source location. Use Find to identify an applicable Indexing Location you previously created—see Configuring Locations.
Click OK. 
- In Output Destination, you can click Change to adjust the output location. Use Find to identify an applicable Archiving Location you previously created.
Click OK. -
- Check Delete items from source after archiving to delete the items from the original repository after they have been archived.
- Select Incremental Archiving to only archive data that was not archived since the last time an archive job was run on the data in question. If a new version of a previously archived file becomes available, the new version is archived as a separate copy but can be traced to the original file.
- Leaving Incremental Archiving unselected will ensure that all content is archived from the very beginning, unless you make a date selection in the following step.
- In Retention Criteria, select the Apply Retention Flag option to apply a flag to messages archived in NetGovern, indicating the period that the archives should be retained within NetGovern.
Set the number of days corresponding to the retention policy you established. These flags will be used in conjunction with deletion (Information Lifecycle Management) jobs. Enter the number of days the retention flag will apply.
The retention period is indicated by the number days. For example, five years is expressed as 1,825 days.
Then choose between Created Date, Archiving Date, or Last Modified Date, which may or may not correspond to each other. -
- In Legal Hold, you can select Use this job to apply Legal Hold. Enabling this option triggers the job to look for users previously placed under Legal Hold in NetGovern Search—see Applying Legal Hold.
If such users are found, any files associated with these users in the location specified above are placed on Legal Hold. - In Indexing, Enable Real-Time Indexing is enabled by default. This function makes it possible to search the archives. Deselect this option if you do not need to search the archives, for example, if you are archiving a particular location for compliance purposes only.
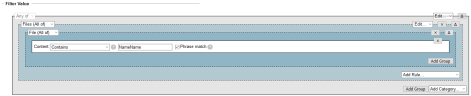
- In Filter Value, you can refine the scope of the documents you want to archive by using the Advanced Search query builder. For example, you can limit the scope to files containing certain keywords, or you can filter by applying a Regex template—see Advanced Search.
- Click Save.
- In the Job Settings tab, enter a Description. You can enter the name of the archive job.
- In the Job Priority section, set a priority, choosing from Low, Normal, and High. Normal is the default priority.
-
NOTE
This setting is useful in scenarios where multiple jobs are running concurrently and you want to control which job takes priority with respect to thread allocation. The job priority you select determines which job in the queue is selected next by the JobManager process, which is responsible for allocating queued job threads to available thread slots on the archive nodes. Prioritization is categorized according to user account. For example, you may want to assign higher priority to crawling files created by VIP users. If a normal priority job is already running and using all available job threads, setting the priority to high and executing it will direct any freed threads to be used on the new high-priority job. This feature works in conjunction with load balancing in order to control crawling job distribution. - If the job will run regularly, set a Schedule. In the Schedule section, choose from the following:
-
Daily: Set the job to run every day. Specify the desired time (HH:MM).
-
Weekly: Set the job to run every week. Specify the day(s).
-
Specify Date: Set the job to run on a specific date (MM/DD/YYYY).
-
Every X minutes: Set the job to run every specified number of minutes.
-
Select Disable if you do not intend to set a schedule for this job.
-
- Select Users. To archive all user accounts, leave All users from location enabled. To specify the accounts for archiving, disable the option All users from location and click Select to find the users to include.
-
Select the Users to include in the job. Click Select to find the user accounts.
-
-
- To list users by ID Filter, enter the User ID Filter. You can also click List Users to list all.
- To lists users by Type, select All, Users Only, or Groups Only.
- To list users by group, select List users of group and select the correct group member list from the drop-down.
- To list users by SSV file, select List users from SSV file and ensure the correct SSV file path is entered.
- Once listed, you can select the users and click Add. When moved to the right-hand display, the users are included.
-
- Click Save.
The job will run according to the schedule you set. Otherwise, click Run Now to start a job immediately. - (Optional) Logging provides you with detailed job logs that can assist with job troubleshooting. In the Log Settings tab, configure desired log settings:
- Disable detailed logging (default setting)
- Enable logging
- Enable logging only for the next run
- You can also have email Notifications sent at the completion of a job, along with attachment options.
-
For further information on logging, see Configuring Logging. - In the Report tab, check on the progress of the job.
For further information on reports, see Viewing Reports.