Configuring SharePoint Connector
To include data from SharePoint in your IPRO
First, complete the prerequisites for configuring the SharePoint connector. Integrate IPRO with Office 365. Register the Crawler application with the Microsoft Identity Platform and grant the permissions required.
When configured, create the Live Location in the IPRO Admin UI. Next, ensure all users are mapped by performing User Mapping. Complete the configuration process by creating Indexing and Archiving jobs to crawl and archive the source data.
Indexing is required to make data searchable. If you intend to search archived data, indexing must be performed. You can set up and run a File Indexing job prior to archiving, or configure a File Archiving job allowing for simultaneous indexing—see Configuring File Indexing and Configuring File Archiving.
When set up is complete, indexed and archived SharePoint content can be viewed, searched, and exported from IPRO Search.
The following steps are valid for parent sites and their subsites, as long as a given subsite inherits the permissions of its parent site.
- Log into SharePoint as Owner of the site you want to index, and select the site.
- Under User Permissions, select Use same permissions as parent site.

- Specify the parent URL.
-
NOTE
If you specify a company's SharePointteam's site, i.e. https://companyx.sharepoint.com, then that does not necessarily mean that you will index all sites, because not all user sites are subsites of the SharePointteam site. - In Settings, select Site Permissions.

- In Advanced Permissions, select Create Group.


- Name and select the required permissions. Assign permissions to groups, and then assign individual users to the appropriate groups. The permission level required by the SharePoint connector is ReadOnly. At a minimum, assign Read access.
- Here is a complete overview of all available permissions:
- Full Control: Has full control.
- Design: Can view, add, update, delete, approve, and customize.
- Edit: Can add, edit and delete lists; can view, add, update and delete list items and documents.
- Contribute: Can view, add, update, and delete list items and documents.
- Read: Can view pages and list items and download documents.
- IMPORTANT
We do not recommend that you assign permission levels directly to individual users because this can make it very difficult to track and manage who has access to sites. It is sometimes necessary, but should be kept to a minimum to avoid complexity. - NOTE
When an item with Contribute role is quarantined, the item is removed from the site. 
- Click Create.
- Select the group you created. Click New, then Add Users.

- Enter the name of the user you want to add.
-
NOTE
The user does not have to be licensed, but they must have permissions to sign in. 
- This user is now a Member.


First, you must complete the prerequisites for configuring the SharePoint connector in IPRO. You can contact your Support Representative for further details on the connector features, system requirements, and pre-configuration process.
Perform the following steps in the IPRO Admin UI. Administrator rights are required.
- Log into the IPRO Admin UI.
- Select Archiving.
- Open the Connectors tab.
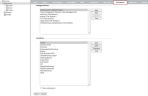
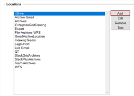
- Navigate to the Locations section. Click Add.
- Click on Live Locations to expand, select Document Store.

- Click Next.
- Select SharePoint as the Source Type.

- Click Next.
- The Document Store Location window displays.

- In the Name field, enter a name that is meaningful to the users and reviewers who will be accessing the data. Include the term "Connector" in the name entered.
-
IMPORTANT
To change a location name, a new location must be created and its data must be reindexed. - In the Description field, enter a relevant description.
- In the URL field, enter the URL of a location with read access:
- SharePoint: http[s]://servername[:port]
- In the User ID field, enter the user ID of an account with read access to the path specified using UPN-format syntax.
-
NOTE
If the IPRO Search services account has the required access, then no additional credentials are required. - In the Password field, enter the password for the account.
- (Optional) Click Test to verify the connection.
- Click Save.
- Click Save at the bottom-left of the Connectors tab.


Following connector and location configuration, perform User Mapping. For more information—see User Mapping. For detailed steps—see Configuring User Mapping
Next, configure File Indexing and File Archiving jobs to process the source data—see Configuring File Indexing and Configuring File Archiving.