Configuring Storage
The following steps explain how to configure store on the servers you have deployed.
The following steps must be performed for each master server you have deployed. if you have multiple clients, you should have deployed one master per client.
NOTE
If you have deployed a worker server, you do not need to configure storage for it. All storage configuration is done on the master server.
If you have deployed a worker server, you do not need to configure storage for it. All storage configuration is done on the master server.
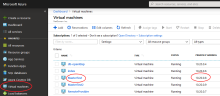
- In the Azure deployment console, click on the master server you deployed.
-
NOTE
The name "MasterTest" is used only as an example. The name you see will correspond to the naming you configured during deployment. - Connect the virtual machine.
- Log in using the OS Admin User and OS Admin password you created when deploying the shared Infrastructure.
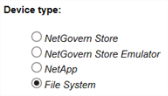
- Go to Archiving and select the Storage tab.
- Under Storage Device, click Add.
- Choose File System and click Next.
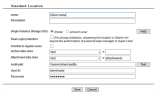
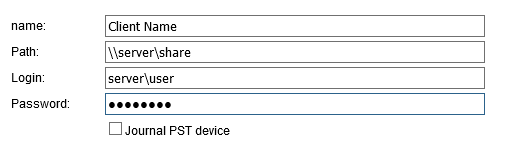
- Fill in the information in the following screen:

-
IMPORTANT
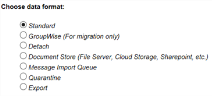
The fields for Login and Password will not appear until you type "\\" in the Path field. - Under Storage Location, click Add.
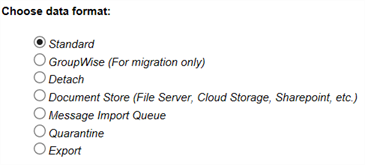
- Select Standard data format.
- Fill in the information on the following screen. Make sure to choose the appropriate storage device in the drop-down list. Names will correspond to the names you have previously configured.
-
IMPORTANT
The fields for User ID and Password will not appear until you type "\\" in the Path field.


Repeat the above steps to create a quarantine and a management device and location.