Configuring Storage
The following steps explain how to configure store on the servers you have deployed.
In a multi-tenant Azure deployment, we recommend storing the data on a shared file server so that all tenants have centralized access to it through a Windows File Share. This will also facilitate infrastructure backup. We do not recommend storing the data on the master server in a multi-tenant environment.
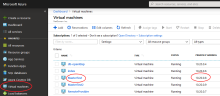
- In the Azure deployment console, click on the file server that was created automatically when you deployed the shared Infrastructure—see Deploying the Shared Infrastructure.

- Log in to the file server using Microsoft credentials that have sufficient rights.
- Create a directory on the data drive.
-
NOTE
For partners, we recommend using the client name for the folder in order to easily identify the data. - Share the folder to ensure users have full access rights. This is consistent with Microsoft best practices to manage permissions on folders, not through sharing.
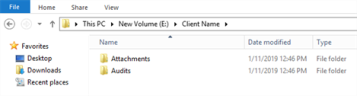
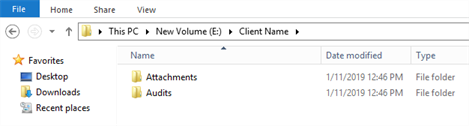
- Create Attachments and Audits sub folders manually.


The following steps must be performed for each master server you have deployed. If you have multiple clients, you should have deployed one master per client.
NOTE
If you have deployed a worker server, you do not need to configure storage for it. All storage configuration is done on the master server.
If you have deployed a worker server, you do not need to configure storage for it. All storage configuration is done on the master server.
- In the Azure deployment console, click on the master server you deployed.
- Log in using the OS Admin User and OS Admin password you created when deploying the shared Infrastructure.
- Go to Archiving and select the Storage tab.
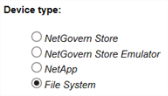
- Under Storage Device, click Add.
- Choose File System and click Next.
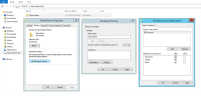
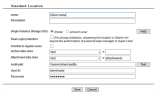
- Fill in the information in the following screen:

-
IMPORTANT
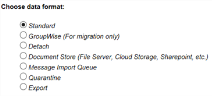
The fields for Login and Password will not appear until you type "\\" in the Path field. - Under Storage Location, click Add.
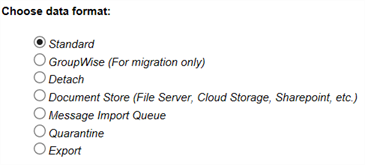
- Select Standard data format.
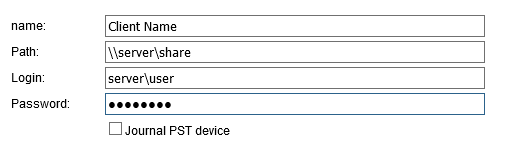
- Fill in the information on the following screen. Make sure to choose the appropriate storage device in the drop-down list (displayed as "test" in the following screen shot).
-
IMPORTANT
The fields for User ID and Password will not appear until you type "\\" in the Path field.


Repeat the above steps to create a quarantine and a management device and location.