Normalize Data
Administrators can review multiple SINGLE_ and MULTI_VALUE fields to standardize words, names, and other data as needed.
For example, an Author field may have several variations of the name “John Smith” (John Smith; Smith, John; or John Ray Smith). Use the Data Normalization feature to change the name to a common presentation.
To normalize data throughout a case:
-
Getting started:
-
Identify needed information, including the case, scope of the action (entire case, specific range, etc.), which fields should be checked, and data normalization guidelines.
-
Select an appropriate time to make global changes.

Depending on the size of the database, system capabilities, and other factors, global functions may consume significant system resources and time. It is recommended that you carry out major global functions during “off hours” to minimize the impact to the system and your users.
-
If users might be logged on, alert them that performance may be affected while you perform this bulk operation.
-
-
In the navigation panel, expand the Client/Case Management menu and click Data Normalization.
-
Select the needed client ID and case.
-
Select the scope of the operation as listed in the following table.
-
Select this option to limit changes to a specific range of documents.
-
Enter the starting and ending image key numbers in the corresponding Start Image Key/End Image Key fields. Or, click
 and select the needed image key(s).
 -
Select this option to limit changes to documents meeting specific search criteria.
-
Click Build Search, then create and run the search. The number of affected documents will be listed in the Advanced Search area. For details on searching, see Use Advanced Search.
-
If saved searches exist in the case, select this option to limit changes to documents meeting the criteria of one of the saved searches.
-
Select the needed search.
-
Select the fields to be checked; either choose the Select All Fields option for all fields or click individual fields of interest. Scroll horizontally to access the complete list of fields.
-
After fields are selected, click Start.
-
If checking an entire case, click OK in response to the warning message. Eclipse SE checks the content of all selected fields.
-
Complete any of the following steps to normalize the data in your case.
-
To navigate through the Summary Items list, use either of the following methods:
-
Scroll bar
-
Navigation toolbar at the bottom of the workspace
-
PgUp/PgDn and Home/End keys
-
-
To change all instances of a word in the same way:
-
Double-click the word (or click its option box).
-
In the Enter replacement for dialog box, enter the needed replacement.
-
Click OK.
-
-
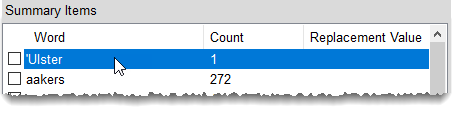
To evaluate/change individual instances of a word:
-
Click the word (not its option box), as shown in the following figure:
-
Click View Detail for selected item.
-
In the Detailed View dialog box, note the image key (BegDoc), the field, the word, and the field detail.
-
Note the presentation of the word (in red).
-
Evaluate the context and enter the replacement value for the current field/document.
-
Click Commit.
-
Repeat step c - g to evaluate and change all instances of the word in all fields/documents.
-
To leave the word unchanged, simply click Find Next.
-
When all fields and documents containing the selected word have been changed, click Done.
-
-
Repeat needed steps for all entries in the Summary Items list to be changed.
-
Review changes in the Replacement Value column; make further changes if needed.
-
When finished, implement all uncommitted changes by clicking Commit Bulk Changes. (Changes committed in step 12 are implemented during that procedure.)
-
Click Finish.
|
Option |
Description |
|
Entire Case |
Select this option to make changes throughout the entire case. |
|
Image Key Range |
|
|
Advanced Search |
|
|
Saved Search |
|

|
NOTE: The amount of time required depends on the size of the case, number of fields selected, system resources, and other factors. |
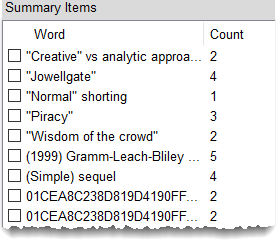
All words found in the selected fields will be included in the Summary Items list, as well as the number of instances (count) of each unique word, as shown in the following figure.
|
|
NOTE: Eclipse SE does not distinguish different capitalizations of a single word. All capitalizations of a word are counted together, and the presentation in the Summary Items list is based on the first instance of the word (in order by image key). If capitalization is important to you, and you know that inconsistencies exist, you can change all occurrences to the preferred presentation (step 10) or view details for the word and make changes selectively (step 11). |
|
|
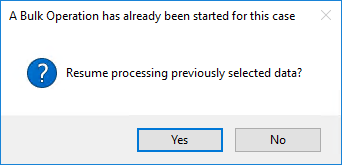
TIP: If you need to quit working in the Data Normalization workspace before all terms have been checked and corrected, you can do so without losing work. When you return to the workspace and select the same client and case, you will be asked whether to resume processing:
|

Related Topics
Last Revision: 6/2/2023
Version: 2019.0.0