Add a User
Before You Begin
For efficient creation and management of users:
-
Decide on the approach to use for user name, user ID, and password details.
-
Name: For example, decide on the order of first and last names (
John SmithorSmith, John). -
User ID: Determine what you will use for user IDs. For example, if your organization has employee IDs, it may be most logical to use those IDs. A maximum of 60 characters can be used.
-
Password: Determine a password approach that will provide appropriate log-in security for your organization. See
-
No other character limitations or particular formats exist for user information.
Add a User
To create users one by one in Case Management:
-
Start Case Management and log in as a Super Administrator. (Only Super Administrators can create users.)

-
In the navigation panel, click the Users tab.

-
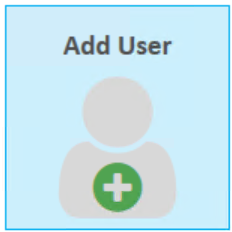
Click the Add User button above the users table. The Add User dialog will appear.

-
In the User Info step, enter the new user’s name (60 characters maximum), user identification, email address, and a password, per your planning decisions (see
-
User IDs must be unique.
-
Passwords must be from 6 - 16 characters long.
-
-
If the added user should not be active at this time, select the Mark as Inactive option. When finished, click the Next button.
-
In the Role/Privileges step, select the role you would like to give the new user.
-
You can add or remove privileges for the user by selecting the check box next to each privilege. See
Click the Next button.
-
In the Group Assignments step, select the group(s) that the new user should be assigned to, and click Next.
-
Review the Summary of the new user's information. If necessary, click the Edit button to navigate to the appropriate step and make any necessary changes.
-
Click Save to confirm that all user information is correct and create the new user.
- To add a new user from the confirmation screen, click Add New User, otherwise click Close.
-
Repeat steps 4 - 11 for all users being added at this time.
-
Inform the user of their LOCAL DISCOVERY login names and passwords.
Related Topics
Control System Access Using Groups, Users, Roles, and Privileges
Version: 2023.8.12
Last Revision: 11/8/2023