|
|
Important: You are reviewing the Ipro for desktop 3.0 Help. To view the latest release of Ipro for desktop Help, click here. |
Create Multiple Document Images (Bulk TIFF)
Ipro for desktop Processing allows you to create .TIFF files (or .PNG for color) for document pages lacking images. The images will be created from native files. The result will be to add images to the case (the Image tab in Review) and to update the IMAGECNT field to reflect the correct number of pages for the document.
Beginning with Ipro for desktop 2019.3.0, bulk TIFFing is a multi-threaded process. Multi-threading speeds up the TIFFing process, which can be particularly useful for large TIFF jobs.
|
|
NOTES: Before performing bulk TIFF operations, note the following:
|

To create TIFF files for pages lacking images:
-
Getting started:
-
Identify which documents need images: either an entire case or documents matching particular search criteria. If a search will be used, identify the needed search criteria or saved search.
-
Select an appropriate time to create images.

Depending on the size of the database, system capabilities, and other factors, this task may consume significant system resources and time. It is recommended that you carry out bulk operations during “off hours” to minimize the impact to the system and your users.
-
If users might be logged on, alert them that performance may be affected while you perform this bulk operation.

TIP: If the documents are diverse from a search standpoint, one approach is to place them all in a private folder and then search for documents in the folder.
-
-
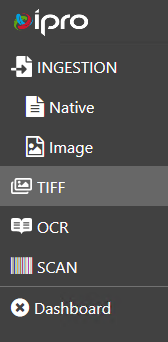
On the Dashboard, click the Processing module.

-
In the left navigation panel, click the TIFF tab.
-
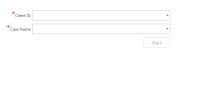
On the TIFF page, select a Client ID and a Case Name from the drop-down menus.
-
Click the Start button. The TIFF Dialog Box appears.
-
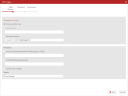
Select the scope of the operation in the box labeled Documents to Process:
-
Process Entire Case: TIFF files will be created for all missing images.
-
Saved Search: Select this option and then select the needed saved search.
-
Advanced Search: Select this option and then click Search. Define and run the needed search. For details on searching, see the Use Advanced Search section in Review. The Doc Count field will display the number of documents resulting from the search.
-
-
Optional: To include or exclude specific types of files:
-
Select the needed option, Process following extensions ONLY and/or Exclude following extensions.
-
In the appropriate field, enter the extensions of file types to be included or excluded, separated by a comma.
-
-
Select Create COLOR Images if needed. When this option is selected, .PNG files are created for color images.
- Select a timeout value from the drop-down list. The system aborts the TIFFing operation on a given document when this value is met, logs an error message, and proceeds on to the next document. Although most documents TIFF quickly, certain problematioc documents may take longer. This option can be useful for preventing the system from taking too long on any one document, and thereby holding up the rest of the data set. Alternatively, you can select No Timeout to allow the system to take as long as it needs to create the TIFF files for every document in the set.
-
When all options are selected, click Start. TIFF (or .PNG) files will be created and placed in case's defined image-file location.
-
Observe status at the bottom of the workspace. The amount of time the operation will take depends on how many images are being processed, whether or not color has been selected, and your system resources.
-
When the operation completes, note important information in the status bar. If errors exist, click View Log File to evaluate the error log.
-
After creating image files, the typical next step is to add corresponding OCR for the new images as explained in Create OCR for Multiple Documents (Bulk OCR).
-
To check images, view them on the Images tab in Review (preferred), or as follows in Administration:
-
In the Administration module, expand Case Management by clicking on the green arrow.
- Click Case Management.
-
Select the needed client
- Select the needed case.
-
Click the Database Records tab.
-
Click List all Records and navigate to the records created for the newly ingested native files.

-
Click
 next to a document of interest and click a page in the document.
 -
Click
 next to the Image File field and check the image.
 -
Repeat to view other new images.
-


Related Topics
Version: 2019.3.0
Last Modified: December 2, 2019