Configuring an Administrator
It is not required to use or maintain the default 'netmail' account. Administrators have the ability to create new admin users, either locally in the product or residing remotely in an Active Directory (AD) group. The steps below explain how to create the authentication route for new admins being pulled from the AD.
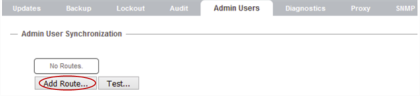
- To create a route for Admin Users, log in to the IPRO Admin UI, and go to Services > Admin Users. Click Add Route.
- Enter data for the LDAP server.
- Host: Enter the host IP address and the port number of the LDAP server.
- Encryption: Select SSL if you want to apply the SSL to the admin authentication.
- LDAP Version: Select either 2 or 3 as your LDAP version

- Enter data for the directory.
- Authentication DN: Enter the authentication DN of a user with enough rights to browse the LDAP directory, using Distinguished Name identifier syntax (i.e., ou=department,dc=example,dc=com).
- Password: Enter a password for the LDAP directory.
- Base DN: Enter the base DN of the LDAP directory, using Distinguished Name identifier syntax.
- User Class Names: Enter the names of the user classes.
- Excluded Class Names: Enter the names of the user classes you want to exclude, not required for Admin Users Auth Route.
- Naming Attribute: Enter a naming attribute (i.e., "sAMAccountName")
- Naming Prefix: Enter a naming prefix, not required if Naming Attribute is "sAMAccountName".
- Disabled Attribute: Enter a disabled attribute, not required for Admin Users Auth Route.
- Disabled Value: Enter a disabled value, not required for Admin Users Auth Route.
- Group Membership Attribute: Enter a membership attribute for the group lookup (i.e., "memberOf")
- Group DN: Enter the DN of the group.
-
NOTE
Auth Routes are used in different IPRO products for lookups against directories. 
- Once you have configured the route, test it to make sure that authentication is possible. Click Test.
- Enter the following data.
- User: Enter the naming attribute for an account that is part of the target group
- Password: Enter the password for the account.
- Bogus User: Enter a user that is not part of the group.
- Click Test Authentication.
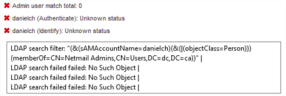
- Green checks mean everything was set up properly. All users that are part of the target group should be listed.

- If you see a red "X", move your cursor over it to get details about the problem.
- Click Done. Click Save Changes to trigger an immediate re-sync.
-
NOTE
If you later add a new Admin User, you can wait fifteen minutes for the changes to be reflected, or you can return to this page and press Save Changes, which will trigger an immediate re-sync.


