Configuring Slack Storage Location
With IPRO, you can create a standard Storage Location for archive data. To archive data in Slack, create a Slack Archive Storage Location in the IPRO Admin UI. You can select the Storage Device on which you would like to build the archive data repository.
NOTE
When the Storage Location is set up, configure an archiving job to process the source data—see Configuring Slack Archiving.
When the Storage Location is set up, configure an archiving job to process the source data—see Configuring Slack Archiving.
IMPORTANT
IPRO supports Slack Enterprise and Slack Plus.
IPRO supports Slack Enterprise and Slack Plus.
- Log into the IPRO Admin UI.
- In the Services menu in the left-hand panel, click on Archiving.
- Open the Connectors tab.

- In the Storage Devices section, you can add the device on which you would like to build the storage location—see Configuring Storage Devices.
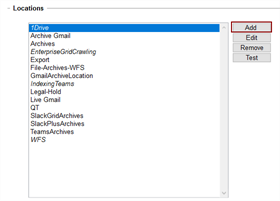
- Navigate to the Locations section to create the location. Click Add.

- Expand the Storage Locations drop-down menu. Select Slack Archive to store archived data from Slack Grid or Slack Enterprise.

- Click Next
- The Archive Location configuration window displays.

- In the Name field, enter a relevant name for the storage location.
-
TIP
Choose a location name that is meaningful to the users and reviewers who will be accessing the archive data. The name is also used by the indexing service. To change the location name, a new location must be created and its data reindexed. - In the Description field, enter a relevant description of the storage location.
- Single Instance Storage (SIS) checks each attachment saved to the system and ensures that only one identical copy is saved within the repository. Files will be saved to a content folder appended to the defined data path. In the Single Instance Storage (SIS) field, select one of the following:
- Global: Enables SIS across all users archived to this location. If multiple users receive one or multiple copies of an identical attachment, only one copy is stored.
- Account Level: Enables SIS on an individual user level.
- (Optional) Enable Dual-Login Protection to ensure that access to the local storage location in IPRO Search will require the authorization of a second Case/Audit manager or IPRO Search Administrator.
- (Optional) Enable Invisible to Regular Users if you would like to hide the location from end users in IPRO Search.
- The storage device options provided in the Archive Data Store and Attachment Data Store fields serve both performance and security purposes. For example, in some cases you may want to store larger and less frequently accessed attachments on slower, cheaper storage.
- In Archive Data Store, select the storage device where the archive data will be stored—see Configuring Storage Devices.
- In Attachment Data Store, select the storage device where you would like to store the data.
- Optional: Specify a subfolder in the localstore device. In the associated + (plus) field, enter the subdirectory path to the selected storage device to which you want the archive data to be written.
- Example: Your storage device has a UNC path of \\localstore\data. If you set the archive data store to localstore and a path of attachments, archive data will be written here:
- \\server1\data\attachments
- In the Audit Path field, enter the UNC path to the location where you want to store the audit files for the data archived to this storage location. You can designate a location for the audit files that is different from where archived data will be stored.
-
NOTE
Since audit files are accessed and updated more frequently than other types of files, they should be stored on faster media. Storing the audit files in a different location also allows the possibility of applying different access rights, although all IPRO Search access is done through the IPRO Search services account. -
WARNING
In order for IPRO Search to function properly, it is important that you do not lose your audit files. This applies to all versions of IPRO Search. It is recommended that you establish a procedure for backing up your audit files, so if you accidentally delete them, they can be restored. For more information on backing up, see Backing Up Archived Files. - Click Test to verify the Audit Path connection.
- Click Save.
- At the bottom of the Connectors tab, click Save.