Create a Data Extract Export Job
Data Extract Export Jobs are created from completed Data Extract Jobs.
Several Data Extract Export output options are available for common data load formats such as Summation, Concordance, Ringtail, and so on. The original files can be exported. For Concordance output, the OCRTXT field can be exported. When the export is complete, a status screen displays showing time, exported number of files, and disk space information. The Data Extract Export uses wizard screens.
-
Click the Client Management tab.
-
Do one of the following:
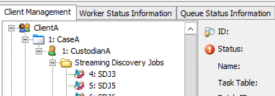
- In Tree View, navigate to the Data Extract Jobs folder (under Custodian). Right-click a completed Data Extract Job to display the context menu. Select Export Extracted Data on the context menu to display the New Data Extract Export Job dialog box. The job you selected shows a selected check box in Tree View.
- In Tree View, navigate to Export Jobs (under Client). Right-click Data Extract Exports to display the context menu. Select New Data Extract Export Job from the context menu to display the Specify Export Parameters dialog box.
-
Do one of the following:

- Choose Select Jobs and then expand the displayed Tree View. Select a Data Extract Job for exporting. Select additional Data Extract Jobs for export by selecting their check boxes. The Export Job Name field populates with the first Data Extract Job you selected. The system goes through each one and stores the data under the directory of the Export Job Name you indicated in the Specify Export Parameters dialog box. If necessary, expand Tree View to view all the Data Extract Jobs.
- Choose Select Export Set to display a list of Export Sets that were created in QC, and then select an Export Set. If necessary, expand any Export Set Containers to select an Export Set that is stored in a container.
-
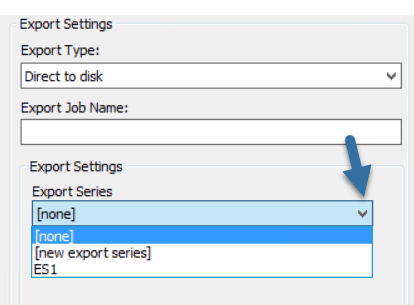
Under Export Settings, on the Export Type drop-down menu, select Direct to disk.
-
Under Export Settings, in the Export Job Name field, enter an Export Job name, If a default name displays in the field, modify it if necessary. This is the name the system uses for the directory name where the exported data is stored.
-
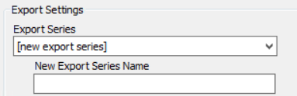
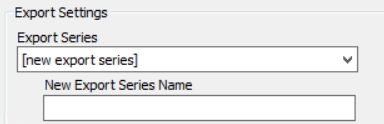
(Optional) Under Export Settings, open the Export Series drop down menu and do one of the following:

-
Leave the default setting [none].
- Select an Export Series from the drop-down menu. See Overview: Export Series for background information about Export Series. Or see Create an Export Series if you want to create the Export Series before the Export Job is created.
-
Select [new export series] and enter a New Export Series Name.
-
-
(Optional) Click the Load from Template browse button, and browse to the ExportSettings.INI template file that has the settings from a previously run Data Extract Export. A file will not exist until you run your first data extract export.


Note: This option is not available if you selected an Export Series from the drop-down menu. This file saves time by not requiring you to manually make selections in some of the Export wizard screens, as well as ensuring that there is consistency when exporting jobs for a particular situation.
-
Select a Task Table from the drop-down menu. The task table that displays in the field is based on the last task table selected for the Client.

-
Click OK. The Select Export Formats and File Handling Options dialog box appears.
Note: A warning dialog box may display if one or more of the selected data extract jobs have not yet passed QC. You can choose to continue with the export; or cancel, QC the jobs, and then export again.
-
Complete the Select Export Formats and File Handling Options dialog box by selecting the required options.

For more information about the various options, click the following to expand:
Export Formats and File Handling Options-
Data Load Formats: Select one or more Data Load Formats.
If the data load file format you are required to create does not display under Data Load Formats, select Custom Export Format. See Custom Export Format for specific information about populating the Select Custom Load Delimiters dialog box.
The IPRO Data Review selection in the Data Load Formats list box generates an IPRO Review.LFP file. An LFP file is an IPRO load file. See Ipro Tech LFP Files for detailed information about LFP files.
-
Export Text Files: Select this option to display additional data load formats of LaserFiche, DB/Textworks, IPRO Data Review, Ringtail, Summation DII, and OCR Control.lst.
-
(Optional)Export Native Files:
Under Native File Options, select from the following:
-
Name file using image key: If this option is selected, the native file directory no longer creates an additional directory for each document. By naming the file using the image key number, there is no longer any chance of duplicate file names occurring. Therefore, the additional level of directories are not necessary. See the following example:

-
Placeholder missing/zero-byte natives: If this option is selected, placeholders for missing and/or zero-byte native files are created. The placeholders for the native files are created in the export output directory. For example, if the native file is named sample.doc, the placeholder file name will be sample.doc.txt.
If the Placeholder missing/zero byte natives option is not selected (default setting), then placeholders are not generated. For zero-byte files, a copy of the file is generated with the same name as the original document. It will not generate any files that were unextractable.
Under Alternate Email Export Options, select from:
- Outlook - Select this option to export an alternate native file for Outlook files. The default export format is MSG.
- Lotus Notes - Select this option to export an alternate native file for IBM (formerly Lotus) Notes files. The default export format is DXL.
- Outlook Express - Select this option to export an alternate native file for Outlook Express files. The default export format is EML.
-
GroupWise - Select this option to export an alternate native file for GroupWise files. The default export format is XML.
Select one of the following formats:
- MHT-Native Export: Exports selected email type to a standardized format rather than to DXL or XML. Types include Outlook, Outlook Express, IBM (formerly Lotus) Notes, and GroupWise. (An MHT is an Archived Web Page file with information in Multipurpose Internet Mail Extension HTML (MHTML) format with an MHT extension. All relative links in the Web page are remapped and the embedded content is included in the MHT.)
- RTF (Rich Text Format): Uses Microsoft Word to open the MHT and saves it in RTF; a more widely accepted format.
- HTML: HTML documents can have inline images, the images themselves are not included in the HTML. The images must be included in the export in order to access the inline images.
File extension options: This option is used if the native documents are missing or have incorrect file extensions. When this is the case, the native file viewers will not work. The correct extension is defined as the value presented in the Extension field of the StellentDefs table in the configuration database for the StellentID of the file. Oracle® Outside In Technology will not identify files it cannot discern with a TXT extension. If necessary, a Database Administrator may manually update through SQL the Extension field in the StellentDefs table with custom extensions. The options on the drop-down menu include:
- None - default setting. Nothing happens.
- Add extension only if missing
- Append corrected extensions - appends extensions that are incorrect or missing.
- Replace incorrect extensions - replaces incorrect extensions with correct extensions or missing extensions.
Click the link, Apply to selected file types and/or QC Flags, to open the Native File Export Inclusions dialog box.
By default, all file types are selected and the QC flags are not selected. For the file types, click Clear All, to clear all the selected file types and then select the specific file types and/or only documents to which the QC flag or flags are attributed. If necessary, click + to expand the list for a file type, such as Microsoft Excel, to display specific versions/types of Microsoft Excel. If either one (file type/QC flag) "hits", the native file will be exported.
Click OK to return to the Export screen. A message displays underneath the link that states the number of file types and QC flags, if any, that were included.
-
-
-
Click
 to proceed to the next step in the wizard. Some steps in the wizard may or may not display, depending on the Data Load Formats you selected.
 -
If you selected Custom Export Format as a Data Load Format in the Select Export Formats and File Handling Options dialog box, the Select Custom Load Delimiters dialog box displays in the wizard.
For information about populating this dialog box, click the following to expand:
Custom Load Delimiter OptionsThe Load Formats selected in the Select Export Formats and File Handling Options dialog box affect the options you can or cannot select in the Select Custom Load Delimiters dialog box.
-
Custom Image Load Delimiters: Select a Between Fields delimiter on the drop-down menu and an Around Fields delimiter on the drop-down menu..
The delimiter drop-down menus show the ASCII character number and a picture of the character to help you select the correct delimiters.
-
Custom Image Load Field Position: Select the entire field you want to reposition and then click either
 or
or  to move it. Repeat for additional fields. Ensure that the fields you want
to include are selected.
to move it. Repeat for additional fields. Ensure that the fields you want
to include are selected. -
If you want a “Y” to indicate a document boundary in the load file, select the option Replace document flag with “Y”.
-
Custom Data Load Delimiters: Select a Between Fields delimiter on the drop-down menu and an Around Fields delimiter on the drop-down menu.
The delimiter drop-down menus show the ASCII character number and a picture of the character to help you select the correct delimiters.
When finished, click
. -
-
If at least one set of text exists in one of the Data Extract jobs or Export Sets selected for the Export job, the Specify Merge Data Options dialog box appears.

For information about completing this step, click the following to expand:
Merge Data OptionsDo the following:
- On the drop-down menu, select the order in which merge jobs display in the Merge Jobs drop-down menu in the Image tab or View tab (Date, Ascending; Date, Descending (default); Name, Ascending; Name, Descending; Custom - use the up/down arrows).
- Clear one or more merge jobs. By default, all merge jobs are selected. The "Original" item refers to the original images and text associated with the document. It displays as the last item in the list of merge jobs and remains selected.
- (Optional) Select the option Always use original page count for image key numbering. This is relevant for Process Exports. This option affects how image keys are assigned to pages when exported and could affect how many images are exported. When this option is selected, it uses the original page count for the document. Otherwise, it uses the total page count of the applicable merge job.
When finished, click
. -
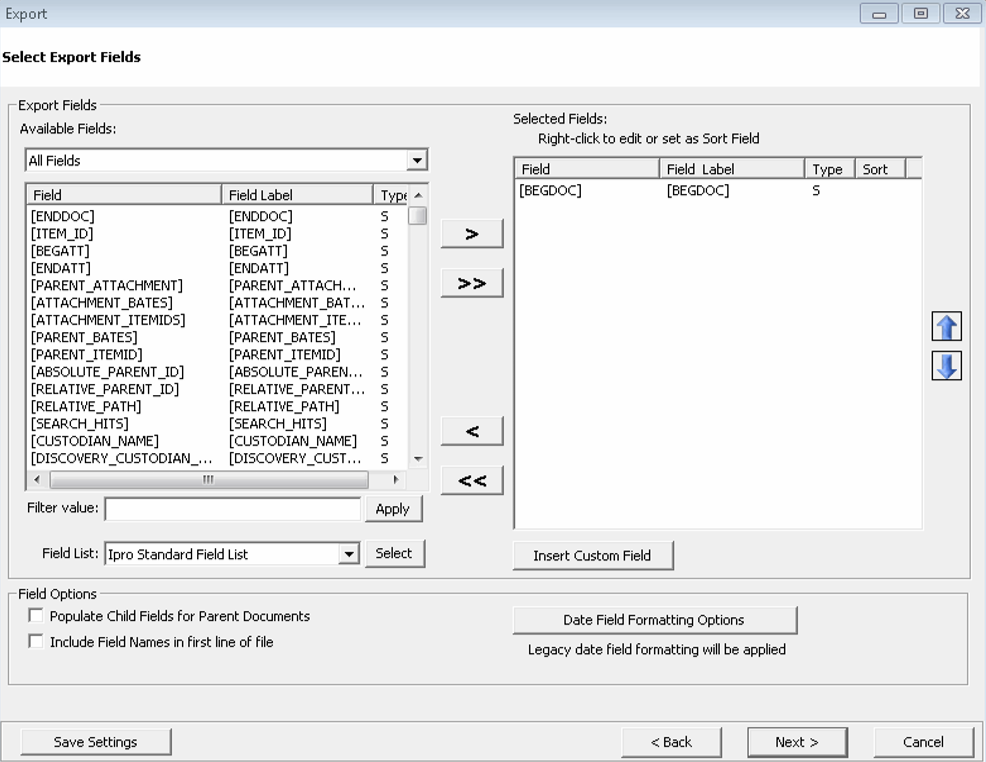
The Export Fields screen appears.

For information about completing this step, click the following to expand:
 Define Export Fields for Databases
-
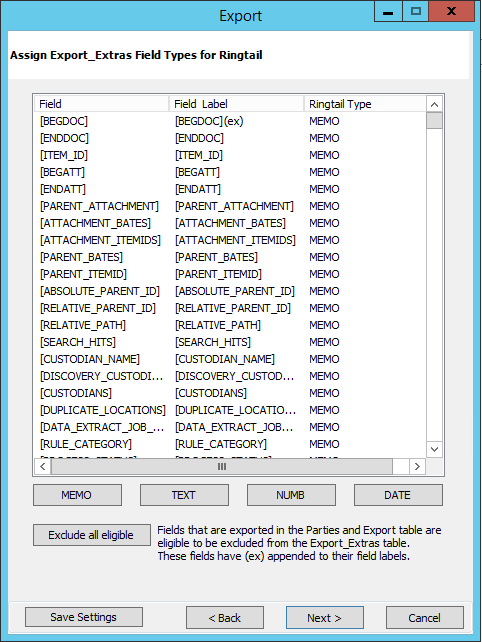
If you selected Ringtail as a Data Load Format in step 10, the Assign Export_Extras Field Types for Ringtail dialog box displays in the wizard.

Click the following for information about populating the Assign Export_Extras Field Types for Ringtail dialog box.
When finished, click
. -
If you selected Summation DII as an Image or Data Load Format, the Specify Summation Options dialog box appears.

Click the following for information about populating the Specify Summation Options dialog box:
When finished, click
. -
The Specify export directory and file options dialog box appears. This is the final screen in the Export process.

Click the following for more information about populating the Specify export directory and file options dialog box.
- (Optional)
Click
 to save the export settings
to an .INI file. For more information, see Save Export Settings.
to save the export settings
to an .INI file. For more information, see Save Export Settings.
- Click
 .
(If you did not define an image key number, the system will prompt you
with a starting image key number.)
.
(If you did not define an image key number, the system will prompt you
with a starting image key number.)


 to display
the File Browser dialog box. Browse to a location, enter a file name,
and click Open. The Save Template As dialog displays and indicates
the path name in the Location field. Click Save.
to display
the File Browser dialog box. Browse to a location, enter a file name,
and click Open. The Save Template As dialog displays and indicates
the path name in the Location field. Click Save.


 to change it.

If this is for a Data Extract Export Job, it will display in the eCapture Controller’s Job Queue. Start the Data Extract Export Job. The Job details are available by selecting the Job in the Tree View (Under Export Jobs, Data Extract Exports). The Status Information Panel has three buttons: View Settings, View Output, and View Report. Click View Settings to display information about the Job. Click View Output to access the files that were created through the Explorer. Click View Report to view the Export Summary Report.
If this is for an Export Series, the Series name will display in the Client Management Tree View under Data Extract Exports; located under Export Jobs. The Export Series will then be available for selection when creating a Data Extract Export Jjob.
Related Topics