Use the Global Replace Function
If more than a few records need to have field data changed in the same way, use the Global Replace function. This function provides an efficient way to change the content of one or more fields in multiple records. For example, you may need to change a server name for all native, HTML, or other files.

|
NOTE: Check with your administrator before performing global replace in LOCAL DISCOVERY. Administration provides additional global options that might be more effective for a particular task. |
Privileges and Conditions Required
A specific privilege is required to use the Global Replace function.
This function cannot be used for the following types of fields: BEGATTACH, BEGDOC, DOCKEY, EXTRACTED TEXT, or any field that is defined with the Primary Key flag. Also, if field-level security is set, Global Replace cannot be used for restricted fields (unless you are a Case or Super Administrator). Contact your administrator if you have any questions about whether you should use this function or which fields may be involved.
|
|
NOTE: When replacing data, ensure that you know the type of field for which data will be replaced and that the replacement data is correct for the type. For example, if a field is NUMERIC, use only numeric data. Or, if a field has a control list, the Search For and Replace With entries must match control list values exactly. |
Perform a Global Replace
To search for and replace data in one or more fields throughout a case in Review:
-
On the Dashboard, click the Review module.

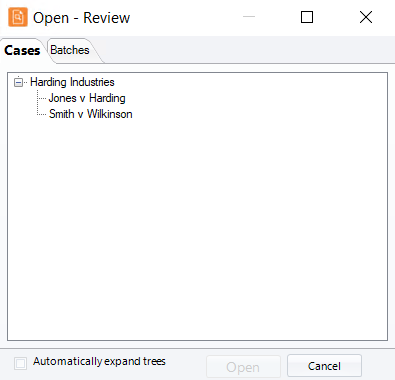
-
Select a Client and Case and click Open.
-
If applicable, limit the global replace to a specific set of records. Do this by creating and opening a Private or Smart Folder, or performing a search for, the needed records and ensuring the needed tab is selected (active) in the documents pane.
-
Click the Review button and select Edit Tools > Global Replace.
-
Select the type of replacement as listed in the following table, then continue with the applicable steps (following the table) to select options and complete your replacement definition.
-
For all choices in the previous step except Replace Field, select the field(s) containing the data to be replaced (or deleted) and click. Note:
-
Use Shift+click or CTRL+click to select a contiguous or noncontiguous set of fields, respectively.
-
To select all fields, click the >> button.
-
To remove one or more fields from the Selected Fields column, click < or >.
-
-
For the Delete Data in Field option, skip to step 10.
-
For the Replace Entire Field, Append, or Prepend options:
-
In the Text field, enter the text to be used to replace, append, or prepend the field content.
-
If appending or prepending text, check the default Delimiter and change or delete it if needed. This delimiter is added before text that is appended or after text that is prepended.
-
Skip to step 10.

TIP: If you are prepending information to a path, either clear the Delimiter field and include needed slash or backslash in the Text field, or enter the slash or backslash as the Delimiter.
-
-
For the Search/Replace option:
-
In the Search For field, enter the text to be replaced.
-
In the ReplaceWith field, enter the replacement text.
-
As needed, select or clear associated options:
-
Match Entire Word: replace whole words only.
-
Ignore Case: replace term regardless of the case used (upper- or lowercase).
-
-
Skip to step 10.
-
-
For the Replace Field option, select the type of replacement:
-
Copy: copy content of the selected Copy From field into the selected Copy To field.
-
Move: move content of the selected Copy From field into the selected Copy To field. Review your entries, then click Go.
-
-
Review your entries, then click Go; in response to the warning message, click OK.
-
When a completion message appears at the bottom of the Global Replace dialog box, perform another global replace action or click Close Window.
-
To check your changes in the Case View or related tab, refresh the application by clicking
 .
.

|
|
Important! Make sure the needed tab is active. If it is not, the incorrect records may be changed. |

|
Option |
Action |
|
Replace Entire Field with Text |
Select this option to replace all content in selected fields (regardless of what the content is). Example: A field specifying the path for native files may contain several entries. Select this option to replace all existing paths with one path. |
|
Append Text to End of Field |
Select this option to add text to the end of the content in selected field(s). Example: Native files may have been moved to a subfolder within a specified path. Use this option to add the subfolder to the path. |
|
Prepend Text to Beginning of Field |
Select this option to add text at the beginning of the content in selected field(s). Example: The relative path for email documents may include a prefix that is missing for selected records. Use this option to add the prefix to the relative path. |
|
Delete Data in Field |
Select this option to remove all data for the selected field(s). Example: An attorney began adding notes into the wrong field and did not follow review guidelines for the notes. It will be most efficient to delete all data in the field and allow the attorney to begin again. |
|
Search/Replace |
Find and replace specific text within a field. Example: Someone’s name may be entered differently in an Author field (such as “A. Smith” and “Adam Smith.”) Use this option to search for and replace one version of the name with the other for improved data consistency. |
|
Replace Field |
Copy or move data from one field to another. Example: Load-file data was mapped to the wrong field when the data was imported. For example, copy the Author field to Sender field or Filetype to Doctype field. |
TIP: If you want to add text to fields that are blank (empty), leave the Search For field blank.
Version: 2023.8.12
Last Revision: 11/8/2023