Create and Edit Private Tags
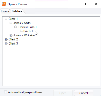
Private tags (also called “personal” tags) exist for your personal use. No one else can see the private tags that you create. Use private tags in any way that will help you organize, monitor, and complete your work. For example, you might want to create a set of tags for follow-up work, as shown in the following figure.

Private tags are listed in the Private Tags group, which is a “virtual” group that appears on the Doc Tags and Page Tags tabs only if you add private tags as explained in the following procedure. Apply private tags as explained in Tag a Page or Document .
If desired, when you are ready to address the records tagged with your private tags, you can search for them using the Advanced Search dialog box, and place the results in a Private Folder (see Add, Edit, or Delete Private Folders and Records).
No special privilege is needed to create and use private tags. Anyone with access to a case or review batch can create and manage their own private tags.
Open the Review Module
-
On the Dashboard, click the Review module.

-
Select a Client and Batch and click Open.


Create Private Tags
To create private tags:
-
Open the needed case or batch in Review.
-
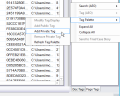
Right-click in the Doc Tags or Page Tags tab and select Tag Palette > Add Private Tag.
-
Enter a name in the resulting dialog box and click OK.
-
Repeat steps 2 and 3 to add other private tags.

Tags will appear in the Private Tags group as shown in the figure at the top of this article. Names must be unique and are not case sensitive. (You cannot have separate tags named “To Check” and “to check.”).

|
TIP: To use relationship rules with private tags, apply or remove private tags using the procedure explained in Tag a Page or Document . |
Delete Private Tags
To remove private tags that are no longer needed:
-
Log in to Review and open the needed case or batch, as explained in Open the Review Module.
-
Make sure the tag to be deleted is not applied to any documents. Check for tagged documents and remove the tag from the search results. For details, see related topics below.
-
Right-click the tag to be removed and select Tag Palette > Remove Private Tag. If the change does not display immediately, you can right-click in the Doc Tags or Page Tags tab and select Tag Palette > Refresh Tag Palette. If the change still fails to display, you can refresh the Review module by clicking the refresh button
 in the top-left corner of the Review work area. Note that doing so, however, will refresh your entire review session. Your Search Results tabs will be closed, and your search history will be erased.
Rename Private Tags
Private tags can be renamed. New names will be used for all documents that have already been tagged and new names are available on the tag palette as soon as they are created.
To rename a private tag:
-
Log in to Review and open the needed case or batch, as explained in Open the Review Module.
-
In the Doc Tags tab, right-click the needed private tag and select Tag (Current Name) > Rename.
-
Enter a new name in the Rename Text dialog box and click Ok.
-
Optional: Repeat these steps to rename other private tags.
Related Topics
Simple Search for Tagged Documents or Pages
Tag Search Results in Private Folders, Smart Folders and/or Documents
Version: 2023.8.12
Last Revision: 11/8/2023