Overview: Transcripts
Case Story gives you plenty of flexibility when working with transcripts in a case. Once you've added a new transcript, you can apply issues and designations to it, link exhibits, and create clips.
![]()
Open a Transcript
You can open a transcript in Case Story using the Transcripts Explorer.
To open a transcript, use the following steps:
-
From the dashboard, click the Fact Management module.

-
Select the Case Story tab in the left navigation panel.

-
Open the needed case by double-clicking the case name in the Cases table. Alternatively, you can select the appropriate case name, then click the Open Case button in the ribbon bar above the table.

-
Open the Transcripts Explorer by selecting the Transcripts tab on the left side of the page.
-
Select a transcript from the list.
-
Click the Open button in the ribbon bar in the Transcripts Explorer.

The transcript opens and appears in the work area.


|
Note: You can double-click a transcript to open it. Alternatively, you can open the transcript directly to a referenced item, such as a designation, by expanding the transcript and respective item folders and double-clicking on the page and line reference. |
Work with the Transcript Work Area Ribbon Bar
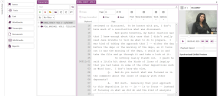
When you open a transcript from the Transcripts Explorer, the transcript appears in the Transcript Work Area. A ribbon bar appears above the transcript in the work area that allows you to perform several actions on the transcript.
![]()
View the following descriptions of each action to learn more:
|
Action |
Definition |
|
Copy |
Copy selected transcript text to paste elsewhere. |
|
Copy Formatted |
Copy selected formatted transcript text to paste elsewhere. Instead of plain text, the selected text will retain the formatted page, line, and timecode references of the transcript.
|
|
Page Prev |
Click this button to navigate to the previous page from the page currently shown. |
|
Page Next |
Click this button to navigate to the next page from the page currently shown. |
|
Find |
Enter text into the Find box and press the Enter key on the keyboard. The Transcript Work Area will find any matches to the entered text in the transcript. |
|
Find Prev |
Click this button to jump to the previous result in the transcript that matches the text entered in the Find field. |
|
Find Next |
Click this button to jump to the next result in the transcript that matches the text entered in the Find field. |
|
Show Annotations |
Use these options to show or hide items added to the transcript in the Transcript Work Area. The following items can be shown:
|
|
Tools |
Use these buttons to enable the different tools available for the transcript. The following items are available:
|
|
Edit Transcript |
Use this option if you need to edit a line of the transcript text. Lines need to be free of any Issues, Redactions, Designations, Notes and Linked Exhibits. |
|
Close |
Closes the Transcript Work Area. |

Related Topics
Add a Redaction to a Transcript
Remove a Transcript from a Case
Open Entry Location in Transcript
Apply a Designation to a Transcript
Add a Redaction to a Transcript
Apply a Quick Mark to a Transcript
Link an Exhibit to a Transcript
Version: 2023.8.12
Last Revision: 11/8/2023