Migrate Cases from LexisNexis Concordance
Overview
In the Administration module, under Case Management administrators can import data and associated files directly from LexisNexis Concordance eDiscovery management software into new or existing Review cases.
This section explains how to migrate a case from Concordance to Review.
What is required?
To import cases from Concordance directly into Review, the following conditions must exist:
-
Concordance 8.x or later must be installed and you must hold a valid license for it.
-
Review must be installed and authorized for use.
The procedures in this section assume you are familiar with Concordance and your existing cases.
What can be migrated?
The following content can be migrated from Concordance .DCB files:
-
Database fields
-
Applied tags
-
Applied redaction categories
-
Issue tags and/or notes
-
Images: If using Concordance Image, the migration will convert your image base, including annotations such as redactions. The following annotations are not converted:
|
Hollow Box Hollow Ellipse |
Solid Ellipse Line |
In addition to migrating the case, Case Management gives you the ability to evaluate and change the Concordance case definition as part of the case migration. Thus the efficiency of migration is combined with the ease of customizing the case to meet your needs.

|
Note: If you have Concordance .DAT files, refer to Overview: Import/Export for details on importing the data. If you have Concordance .CAT files, migrate each file comprising the .CAT file individually into the same Review case. |
Step 1: Setup Migration
|
|
CAUTION: You cannot save a portion of a case migration (such as your entries for steps 1 and 2). If you exit the application before completing all four steps, you will lose your work. |

Preparation
Familiarize yourself with the Concordance database and review About Database Fields to determine how you want to import and map the Concordance data.
If importing into an existing Review case, back up the case before you begin. See Back Up/Archive and Restore Case Data for details. Also, review the Review case and determine whether you will be overwriting existing data and/or adding new data.
Define basic information
Complete the following steps to begin the migration process:
-
On the Dashboard, click the Administration module.

The Administration module displays.
-
Click the Case Management arrow.
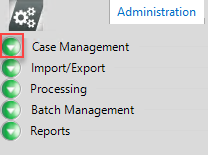
-
Then, click Migrate from Concordance.

-
Select Concordance Database: Enter the full path for the Concordance database (.DCB file). Alternatively, click
 and navigate to/select the Concordance database (.DCB file), then click Open.
NOTE: Concatenated databases (.CAT files) should not be migrated. However, you can migrate individual .DCB files and/or import individual .DAT files for the databases comprising a .CAT file into one Review case.
-
To import into an existing case:
-
Click Select in the Import into an Existing Case area.
-
Select the client and case.
-
Continue with Step 2: Map Fields.
-
-
To create a new case, click Select in the Create a New Case area and add the following details.
Concordance Migration: Basic New-Case Details
Item
Description
Client ID
Select the client whose case is being defined. If the client is not listed, add it as explained in Overview: Clients, then return to case migration.
Case Name
Enter a name for the case. This name must be unique and cannot include certain special characters. If a character is not allowed, you will be notified.
The hyphen, underscore, and parentheses are among the characters allowed. Maximum length is 60 characters.
NOTE: The maximum length for a fully qualified file name, which includes the case name and data directory path, is 260 characters (<248 characters for the path). Ensure that the case name and path do not exceed this maximum.
Matter Number
Optional: Enter a case matter number of up to 100 characters.
Data Directory
Enter the full (UNC) path and folder to contain all case data files. Alternatively, click
and navigate to/select the folder, then click OK.See also Case Name note above.
Native Time Zone Offset
Optional: This setting controls the offset to Greenwich Mean Time (GMT) that is applied during date and time formatting. The default setting is GMT (0 offset). This setting can be made after the case is created if preferred.
In Review, this offset controls how header date and time values display for emails in the Quick View tab. It also controls the date and time for TIFF images generated from the Quick View tab (TIFF-on-the-Fly).
This setting will not affect or modify dates and times stored as text or in the metadata fields associated with the displayed values. Thus, the values in the native files may differ from those in the Quick View tab (or TIFF-on-the-Fly images).
To modify the native time zone offset:
-
Click
 .
. -
Select the needed time zone offset and click OK.
-
-
When creating a new case, complete the following steps to ensure the fields for the new case or load files are defined as needed:
-
Review all field details in the right pane of the Step 1. Set Up Migrationtab. (You may need to maximize the window and/or scroll to see all fields and columns.) The following figure shows an example; note that you can sort any column by clicking the column heading.
-
Edit, create, and/or delete a field for the Review case by clicking its
 button in the rightmost column and making needed changes. See the following figure and table, as well as About Database Fields.
 -
Make changes for other fields while the dialog box is open.
-
When finished, click OK.

NOTE: Field changes can also be made after the case is migrated.
Concordance Migration: Field Considerations
Item
Consideration
Image key
The image key field in the Concordance database will be automatically detected. Do not change this field’s type on the Step 1 tab. Make other changes if needed (such as field name).
OCR text
To include the Concordance OCR text, ensure that an EXTRACTEDTEXT field is included.
Field names
By default, field names for new cases or load files will match those of the Concordance case.
NOTE: If you change a field name so that it does not match the Concordance name, you will need to manually map the field in the following step.
Concatenated fields
If you will be concatenating fields (mapping two or more fields into one Review field), ensure that those fields are of the same type.
Field position
The default field position is the default order in which fields will appear on the Step 2 tab, as well as locations such as Case Management > Database Fields tab and in Review's Case View or related tab.
To change the field position in the Modify Field Definitions dialog box, ensure that the field table is in ascending order by the Order column, then select a field to be moved and click the Up or Down button until the field is in the needed position.

-
- When finished, continue with Step 2: Map Fields.

Step 2: Map Fields
Match the data fields defined in your Concordance case to the fields defined for the case.
The following example shows the Step 2 tab in which the administrator is mapping a Review field to the Concordance ISSUE field.

Notes:
-
If you are creating a new case, fields are “mapped” in order to create them. Only the fields you map, plus required system fields, will be created in your new case.
-
As a minimum, the Concordance image key field (for example, BEGNO) must be mapped to the BEGDOC field.
-
To include the Concordance OCR, make sure that field is mapped to the EXTRACTEDTEXT field.
-
More than one field in the Concordance database can be mapped to a single field in the case, providing the file type is the same. For example, the Concordance database may have two fields to define an author’s name (First Name, Last Name). In theReview case, a single field might be preferred for this information (Name).
-
Review required system fields (BEGATTACH, ENDATTACH, ENDDOC, EXTRACTEDTEXT, FILE_EXT, FILE_ID, IMAGECNT, MD5_HASH, NATIVE, NATIVE_SIZE, TEXT_SIZE) will be created for the new case whether or not they are mapped.
|
|
NOTE: If the BEGDOC field is incorrectly mapped, your case will be migrated, but the data will be invalid and subsequent problems will occur. |
There are two ways to match fields for document data. Complete one of the procedures below to match fields to your document data.
 Auto-Select Fields
Manually Match Fields
 and choose the needed field.
 Select tag, issue, and other options
After all necessary fields have been mapped, make selections on the bottom of the Map Fields workspace based on the content of the Concordance case and needs of the Review case:
-
Tag Options: If the Concordance file being migrated includes tag data, select from one of the following options:
-
Exclude All Tags: Select this option to ignore all tags in the Concordance case. The migrated case will include no tags.
-
Ignore Private Tags: Select this option to not import any private tags in the Concordance case. If this option is not selected, Concordance private tags will become Review public tags.
-
Make Root Level Tag Groups: Select this option to import tags into a tag group named for the first level of a set of nested Concordance tags. If this option is not selected, tags will be imported to the group “Imported Tags.”
-
-
Issue Tags: If a) you did not exclude tags in step 1, b) the Concordance file being migrated includes issue tags, and c) you want to import them, select the Include Issue Tags option. In addition, select one of the following options:
-
Include in Same Group as Doc Tags: Select this option to include issue tags in tag groups defined for the case.
-
Create Issue Tag Group: Select this option to create a new group specifically for issue tags.
-
-
Issue Notes: If the Concordance file being migrated includes issue notes and you want to import them, select the Include Issue Notes option. In addition, select one of the following options:
-
Import into Field: Select the field into which the notes will be imported.
-
Create New Field: Enter a name for a new field into which the notes will be imported.
-
-
Options: Select additional options as described in the following table.
-
If a delimiter is not needed, select (none) skip to the Date Format selection.
-
To use a semicolon as the delimiter, select ; and skip to the Date Format selection.
-
To use a different delimiter, select Custom and continue with the following steps.
-
In the Create Custom Delimiter dialog box, click the Characters or ASCII Values option, depending on how you will specify the delimiter character(s).
-
If you select Characters, enter the character(s) in the top field under the Characters option. Separate more than one character with a space. The ASCII value for each character appears in the bottom field.
-
If you select ASCII Values, enter the ASCII value(s) for the needed character(s) in the top field under the ASCII Values option. Separate more than one value with a space. The character corresponding to each value appears in the bottom field.
-
When finished, click OK.
-
-
If you are migrating into an existing case and want to include partial dates, ensure the Date Format Options for the case are set as needed.
-
If you are creating a new case, dates will be migrated in whatever form they exist in the Concordance database; date options can be defined for the case afterward.
-
When all options are selected, go to Step 3: View Migration Progress.
|
Option |
Description |
|
Merged Field Delimiter |
If you concatenated fields during field mapping, select a delimiter to separate the merged field data: |
|
Date Format |
Select the date format that most closely matches the dates in your Concordance case. For example, if your case includes dates in the format of dd-mm-yyyy, select the Consider the following information regarding partial dates (for example, 09-2009): |
Step 3: View Migration Progress
This procedure “introduces” Review to your Concordance database and imports the database into Review.
-
In the Map Fields workspace, click Import Records.
-
Click Next to watch the migration progress in the View Progress step.
-
Once the migration is complete, click Next to continue with Step 4: Verify the Migration .
Step 4: Verify the Migration
Once data is migrated intoReview, complete these steps to view and verify record details:
-
In the Verify step, evaluate records as explained in
Possible activities include:
-
Reviewing the Documents list and document/page details
-
Deleting a document or page
-
Checking/changing image (or native) file path
-
Viewing images
-
Correcting the path for the case images
-
-
When finished, click Next to continue with Step 5: View Imported Tags.
|
|
NOTE: If the Concordance image path did not include a hard drive or UNC drive, Review precedes the path with the volume name “CONCORD1.” Correct the path for this volume in the Volume Information area of this tab. |
|
|
TIP: Reports that can help you evaluate the imported records are available in Case Management. See Overview: Reports for details. |

Step 5: View Imported Tags
By default, Review includes no tags. If tags were included in your migration, complete the following steps:
-
In the View Imported Tags step, review the migrated tags and take one of the following actions:
-
To make changes now, click the Modify Tag Palette button and add, modify, or delete tags as needed.
-
To make changes later, when you are finished reviewing the tags, go to the next step. (When you are ready to make changes, see Overview: Edit Cases.)
-
-
Click Next to continue with Step 6: View Imported Redaction Categories.
Step 6: View Imported Redaction Categories
If redactions were included in your migration, complete the following steps:
-
In the View Imported Redaction Categories, review the migrated redactions and take one of the following actions:
-
To make changes now, click the Modify Redactions button and add, modify, or delete redactions as needed.
-
To make changes later, when you are finished reviewing the redactions, go to the next step. (When you are ready to make changes, see Overview: Edit Cases.)
-
-
When finished, click Next to confirm that the case was migrated successfully.
Version: 2023.8.12
Last Revision: 11/8/2023